| 6 |
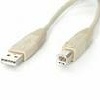
Connecting the printer to your PC's USB port requires a standard
USB cable. The printer is shipped with this type of cable if it has
the USB option installed. |
|
|
| 6a |
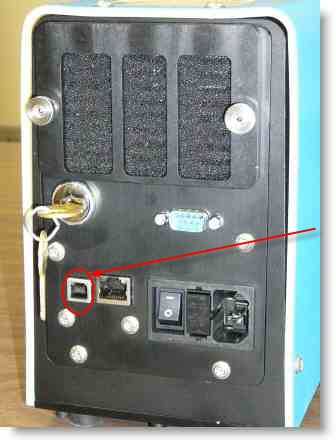
Locate the USB port on the back of the printer as shown in the
figure below. Note that your printer model may look different that pictured here. |
 |
Connect one end of the USB cable to this port on the printer, but DO NOT
connect the other end of the cable to your PC.
It is important that you wait until instructed to connect the USB cable to your
PC |
Turn the printer ON and wait for it to initialize. |
|
| 6b |
After you selected USB as your connection type, you will see a
screen that looks similar to the one shown below. |

Even though you are using a USB port to connect your PC to the printer, the
LabeLase® Producer software still expects to talk to the printer via a COM
port. To make this work, the USB driver that you are about to
install will create a "virtual" COM port that will fool Producer into
thinking it is talking to a standard COM port, but will in fact use the USB
connection.
When you are ready to install the USB "virtual" COM port driver, click
Next.
|
|
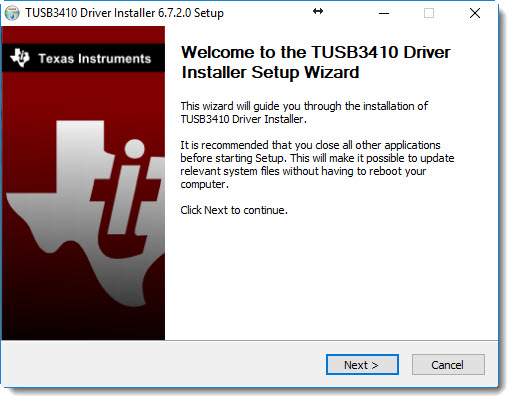
| 6c |
When the USB installer (also called the VCP installer) begins,
you will see a screen like that shown below. Note that the appearance of the
screen may vary according to your operating system version. |
|
You will need to read and agree to the Software License Agreement for the USB
drivers.
|
|
| 6d |
You must agree to the Texas Instruments license agreement to continue with the driver installation. |
|
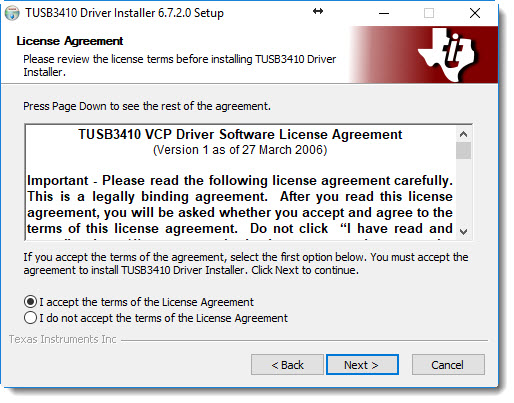
Select the I Accept radio button and click the Next button to continue.
|
|
| 6e |
After the USB driver has been successfully installed, you will
see a screen similar to the one shown below. |
|
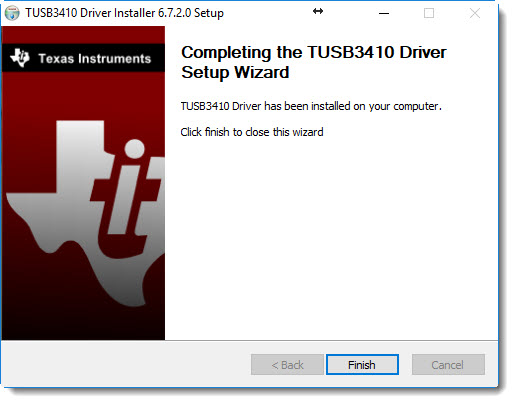
Click the Finish button to continue with the installation. |
|
| 6f |
After the USB driver installation has completed, the LabeLase®
Installer will present the screen shown below. |
|
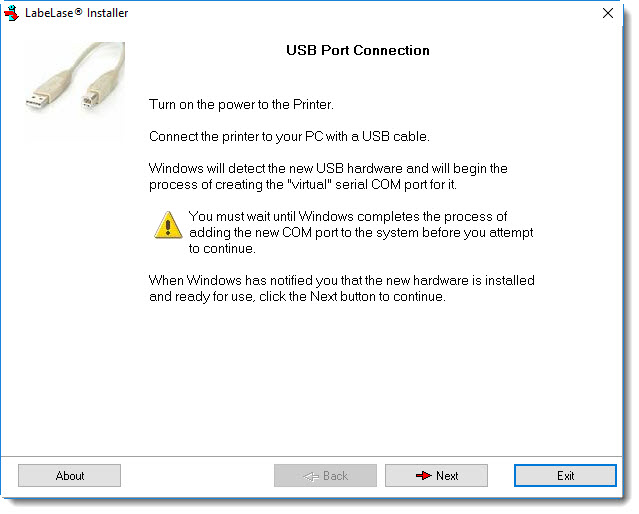
It's now time to connect the printer's USB cable to an unused USB port on your
PC. Make sure that the printer's power is on and that it has
completed its initialization before connecting the cable. |
|
| 6g |
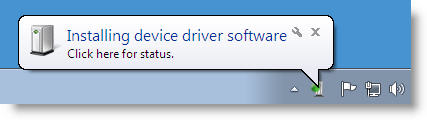
A few seconds after you connect the USB cable to your PC,
Windows will detect the newly added hardware and will display a notice in the
system tray. The next step differs depending upon the version of Windows. |
|
Windows 7
On computers running Windows 7, the Found New Hardware notice may also be
accompanied by a security warning. Allow the driver to install. The
driver installation usually completes without further action. and Windows will
notify you that the device driver software was installed successfully.
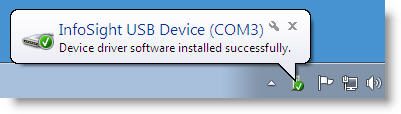
Proceed to step 6h
Click Next to continue. |
|
| 6h |
Once Windows tells you that the new hardware is installed and
ready to use, you can continue with the LabeLase Installer below. |
|
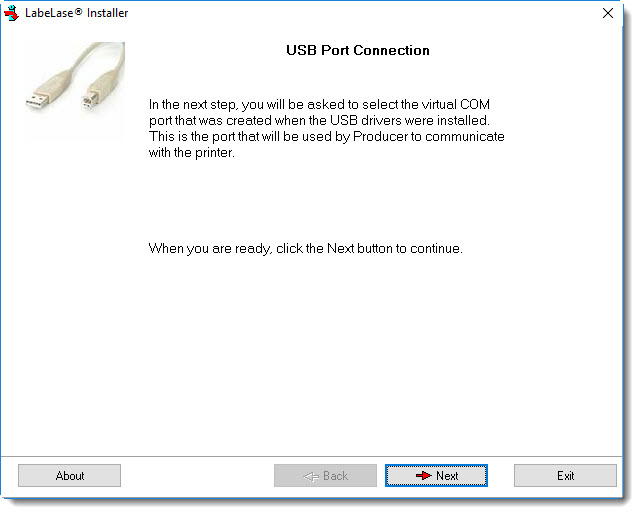
Now that the USB drivers have been installed, there should be a new COM port
added to your system that is actually the "virtual" port.
When you click Next on this screen, the program will attempt to find the newly
added "virtual" COM port. |
|
| 6i |
After you have installed the USB virtual COM port, you will see
a screen that looks similar to the one shown below.
Note that the actual list of COM ports will vary from this figure depending on
the number of ports that are installed on your PC. |
|
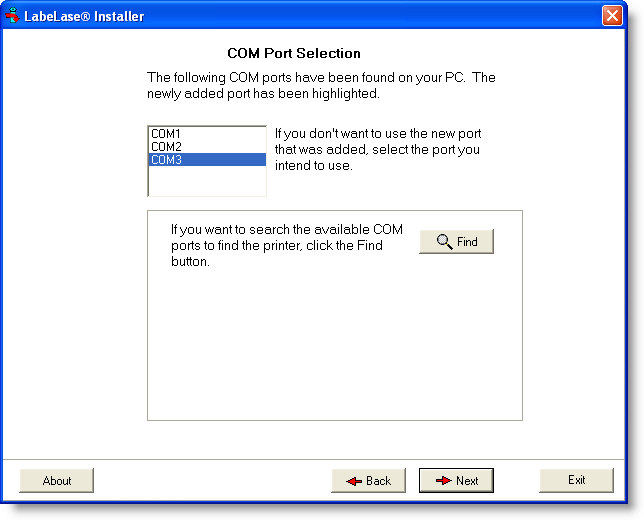
The installer program detected the addition of COM3 when the USB drivers were
installed, so it has highlighted that port name in the list. If you
wish, you can now click Next to continue to the next step.
If you want to test the port to make sure it can communicate to the printer,
proceed to step 6j below.
Note that if you are running this installation program for a second time, you
may have already added the new COM port during the previous installation.
In that case, the installer will not detect the addition of a new port so you
will be required to select it yourself in the list of ports before you can
continue. |
|
| 6j |
If you're not sure what the port name is or you want to test the
port connection, click the Find button. The program will attempt to
communicate with the printer on each of the COM ports in the list. |
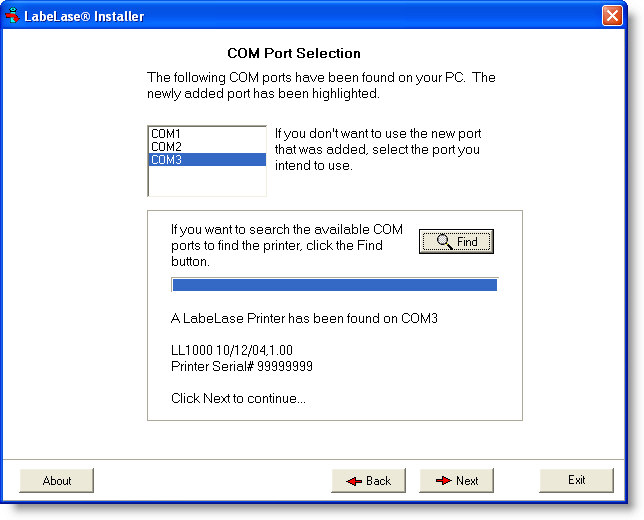
As you can see in the figure above, the program found a LL1000 model printer on
the COM3 port. It has displayed its model number, firmware version and the
printer's serial number.
|
|
| 6k |
Once you have selected or found the COM port that the printer is
attached to, click the Next button to continue. |
| If you did not use the Find button, or the program
was not able to communicate with the printer, then you will skip to Step
8 where you will select your printer model from a list.
If you used the Find button, and the program successfully found and communicated
with the printer, you will continue on toStep 9 where
you will install the version of LabeLase® Producer that is appropriate for
your printer model.
|
|
|
 USB Port