| 7 |
Connecting the printer to your PC via an Ethernet Network
connection requires one of two connection types. |
- The printer is normally connected to your local area network (LAN) via a
standard patch cable and either a network switch or hub.
- The printer can be directly attached to your PC's Ethernet port via a
special cable called a cross-over cable.
|
|
| 7a |
Before you can begin connecting the printer to your LAN, you
will need several pieces of information. If you're not sure how to
supply the following information, contact your Network Administrator for
assistance. |
|
What You Need to Know
Hardware Address
You need to know the printer's hardware address (also known as a MAC address).
It is on
a label on the bottom of the printer, in the format: 00-20-4A-XX-XX-XX, where
the XXs are unique numbers assigned to the printer.
| Hardware Address: |
00-20-4A-_____-_____-_____ |
IP Address
Your printer must have a unique IP address on your network. The Network
Administrator
generally provides the IP address, subnet mask, and gateway. The IP address must
be
within a valid range, unique to your network, and in the same subnet as your PC.
| IP Address: |
_______ _______ _______ _______ |
| Subnet Mask: |
_______ _______ _______ _______ |
| Gateway: |
_______ _______ _______ _______ |
You have two options for assigning an IP to your printer. If your
Network Administrator assigns IP addresses manually (called a static address),
obtain the required information from your administrator.
If devices on your network obtain their IP addresses from a DHCP server (called
a dynamic address,) then you won't need to know what the IP address, subnet mask
or gateway are as the printer will get them automatically.
|
|
| 7aa |
Locate the Ethernet jack (RJ45) on the back of the printer as
shown in the figure below. |
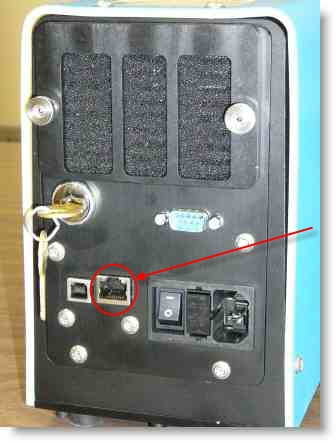 |
Connect one end of the Ethernet cable to this jack on the printer, and the other
end to a network switch or hub.
You may instead connect the printer directly to your PC with a cross-over cable
(no switch or hub).
Turn the printer ON and wait for it to initialize. |
|
|
| 7b |
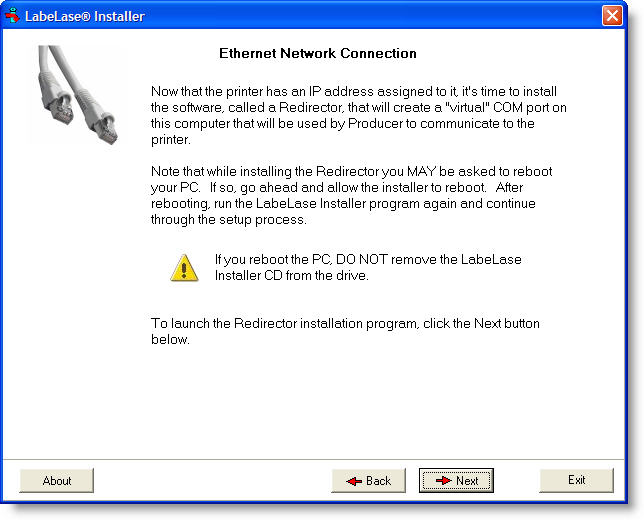
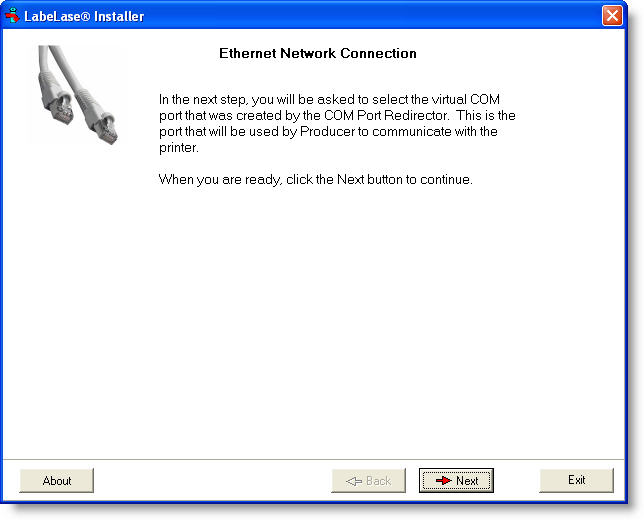
After you selected Ethernet as your connection type, you will
see a screen that looks similar to the one shown below. |

Even though you are using an Ethernet network connection to connect your PC to
the printer, the LabeLase® Producer software still expects to talk to the
printer via a COM port. To make this work, the software that you are
about to install, called a Redirector, will create a "virtual" COM
port that will fool Producer into thinking it is talking to a standard COM port,
but will in fact use the Ethernet connection.
When you are ready to continue with the installation, click Next.
|
|
| 7c |
In the next screen, shown below, you must tell the program how
you want to assign its IP address, subnet mask and gateway. |
|

Select the method you will use and click the Next button.
|
|
| 7d |
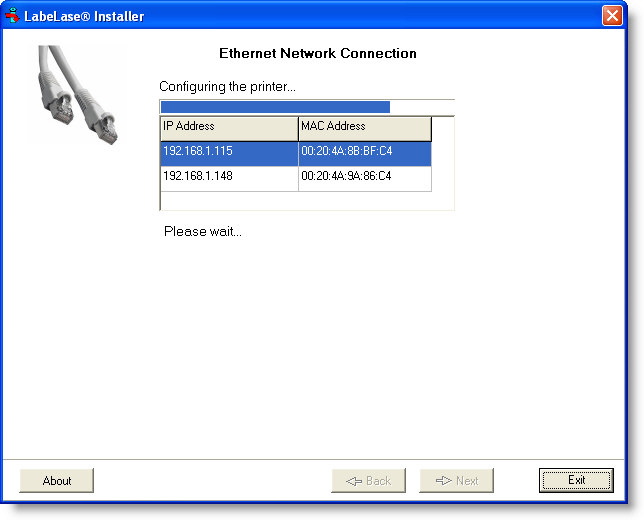
The program will scan your LAN, as shown below, to find any
LabeLase® printers that are connected to your LAN. |
|

|
|
| 7e |
After the initial search for the printers on the LAN, the
following screen will be shown. |
|

Note that more than one printer may be found on your network. You
will need to know which printer you are connected based on its MAC address.
The MAC address was previously found on a label on the back of the printer.
Note that the IP address of any un-configured printer may not be valid for your
subnet. If that's the case, it will be shown in the color red.
At this point, the MAC address is more important than the IP address so select
the printer by its MAC address.
Highlight the printer you are installing and click the Next button.
If you had previously selected the dynamic method (DHCP server) of configuring
the printer's IP address, proceed to step 7f below.
If you had selected the static method (manually assigned) of setting the IP
address, skip to step 7g.
|
|
| 7f |
Dynamic IP Address : If dynamically assigning the IP
address, the configuration of the printer will begin immediately. |
|
The configuration of the printer's IP address, subnet mask, gateway and
communications parameters takes several seconds.
Skip to section 7h to complete the installation process.
|
|
| 7g |
Static IP Address : If statically assigning the IP
address, the following screen will require you to enter the necessary
information. |
|

On this screen, enter the printer's static IP address, its subnet mask and
default gateway. When you first enter the IP address, the program
will calculate the subnet mask for you based on the class of the IP address.
You may modify this computed subnet mask if you wish.
After entering the required information, click Next to continue with the
configuration process.
|
|
| 7h |
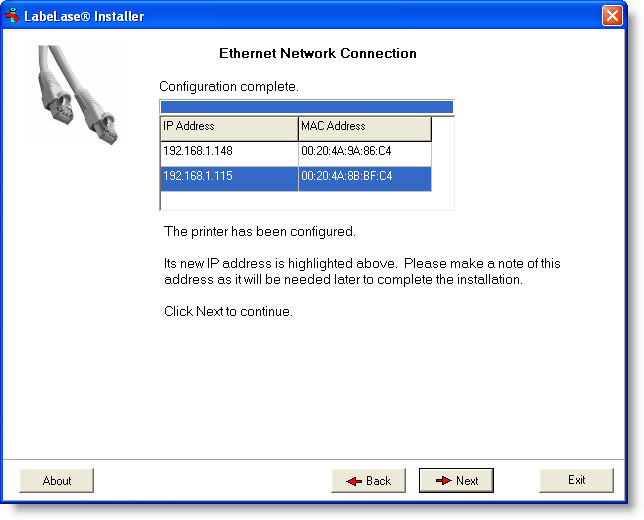
When the configuration is complete, you will see the screen
shown below. Note that the IP addresses shown in this figure are for
example only and do not reflect what you may actually see. |
|
 Note
that Windows may issue a warning that it has blocked the installer from acting
as a server. If you see this warning, tell Windows to unblock the program. Note
that Windows may issue a warning that it has blocked the installer from acting
as a server. If you see this warning, tell Windows to unblock the program.
Click Next to continue.
|
|
| 7i |
After the printer has its IP address, you must install the COM
Port Redirector software. |
|
When you click the Next button, the program will begin to install the COM Port
Redirector (Redirector) software on your PC. This is the software
that will create the "virtual" COM port used by Producer to talk to
the printer.
During installation of the Redirector, you may be required to reboot your PC.
If so, go ahead and reboot. The LabeLase® Installer (this program)
will run itself again automatically after the reboot and continue where it left
off by running the Redirector.
Click Next to begin installing the Redirector.
|
|
| 7j |
When the Redirector installer starts, it must first unpack its
installation files into a folder on your PC. The screen below allows
you to change the default location for these installation files. |
|
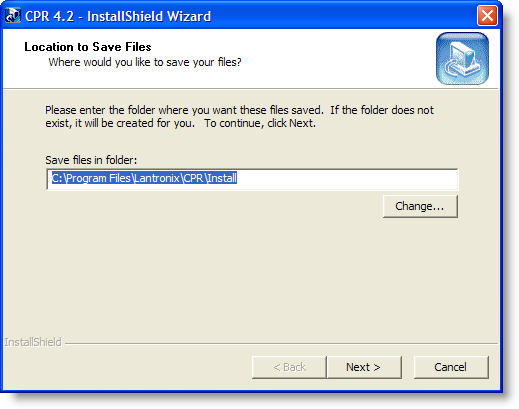
We recommend that you keep the default installation folder and click Next to
continue.
|
|
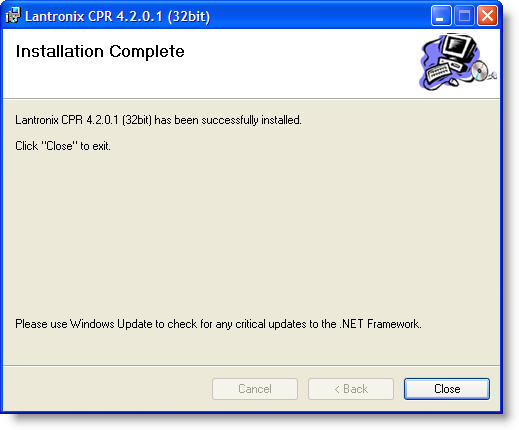
| 7k |
The Redirector installation files have been unpacked; the final
installer program will run as shown below. |
|

Click Next to continue.
|
|
| 7l |
Choose the installation folder for the Redirector if you must. |
|
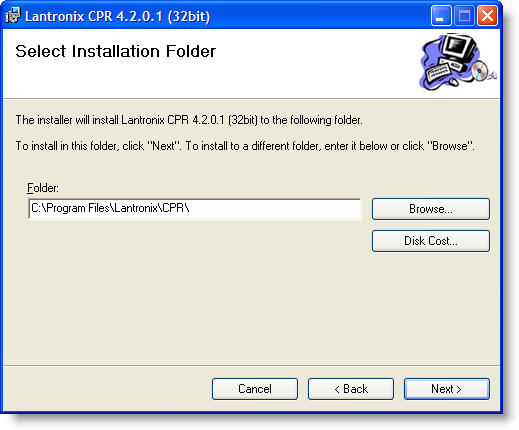
We strongly recommend that you let the Redirector install itself in its default
folder. This will make it easier for the LabeLase® Installer to find
and run the Redirector after it is installed. If you choose to
install it in a different folder, you will be asked to find the program when the
LabeLase® Installer resumes.
|
|
| 7m |
The installer is is now ready to install the Redirector on your
computer. |
|
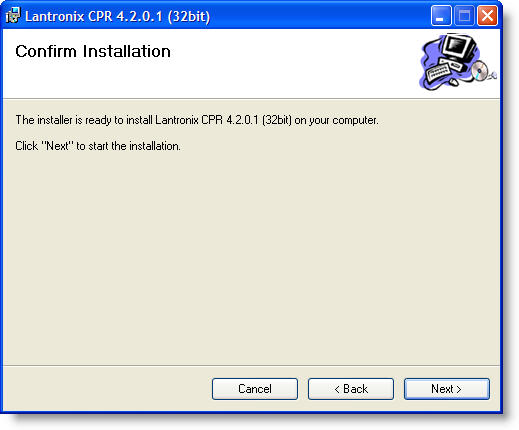
Click Next to continue.
|
|
| 7n |
After the Redirector is installed, you may be required to
reboot your computer. In most installations, rebooting is not required.
However, sometimes it is necessary to reboot after installing the Redirector. |
|
If you are told to reboot, we strongly recommend that you reboot your computer
before proceeding. After you reboot, you must run the LabeLase®
Installer again and proceed through the Ethernet setup process. It
will then be able to run the Redirector that was just installed.
|
|
| 7o |
After your PC has been rebooted, the LabeLase® Installer
will resume where it left off, showing the screen below. |
|
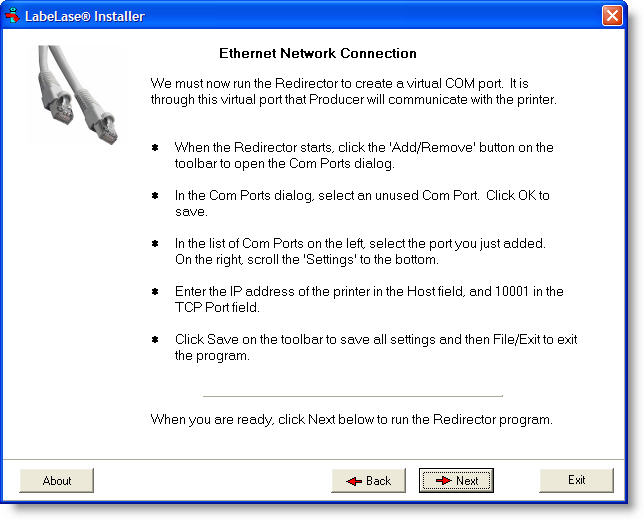
This screen gives you an overview of the next process, which will be to run the
Redirector and add a virtual COM port to your PC.
Please review these steps and click Next when you are ready to run the
Redirector.
|
|
| 7p |
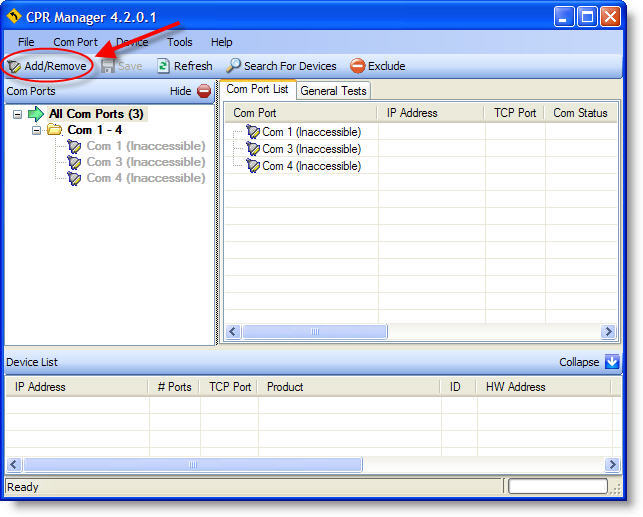
When the Redirector runs, you will see a screen similar to the
one below. Note that the COM port names shown here are for example only,
and may be different on your PC. |
|
To begin, click the Add/Remove button on the toolbar. This will open the
Com Ports dialog that allows you to select the name of the new port.
|
|
| 7q |
After click the Add/Remove button, the Com Ports dialog will
allow you to select an available COM port number to be used to connect to your
printer. |
|

Select an unused COM port and click the OK button to continue.
|
|
| 7r |
After selecting a COM port number, you must configure the port
as shown below: |
|
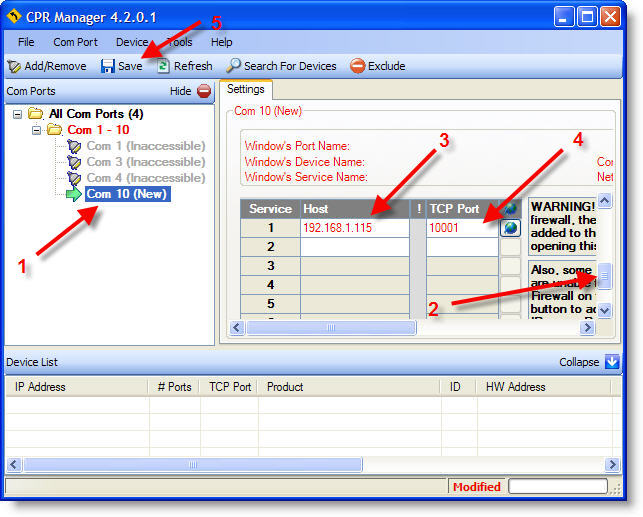
In order to create a virtial COM port (COM10 in this example) you must add an IP
address to associate with it. The address we are going to add will be the
IP address that was previously assigned to the printer.
1 - Highlight the new port that you just
added.
2 - Scroll the Settings page to reveal the
Host and TCP Port settings.
3 - Enter the IP address that you previously
assigned to the printer. Note that the IP address shown here is for
example only. You must enter your printer's IP address.
4 - Enter 10001 into the TCP Port field.
This is the TCP port number that the printer will monitor for connections from
the computer.
5 - Click the Save button on the toolbar.
This will save your settings and create the new COM port. Note that
if Windows warns you about security concerns with the new software, simply
instruct it to "Continue Anyway".
|
|
| 7s |
After saving your settings and confirming the new software with
Windows (if necessary) you will see the screen shown below. |
|
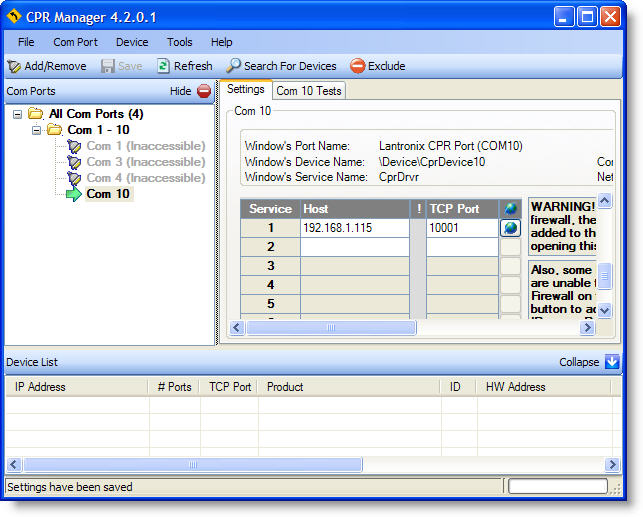
Select File / Exit to close the program. The LabeLase® Installer
program will resume.
|
|
| 7t |
The Redirector now has added a virtual COM port to your PC. |
|
You must now select this new port to be used by Producer. Click Next
to continue.
|
|
| 7u |
After you have installed the Redirector, you will see a screen
that looks similar to the one shown below.
Note that the actual list of COM ports will vary from this figure depending on
the number of ports that are installed on your PC. The port numbers
shown are for demonstration purposes only. |
|
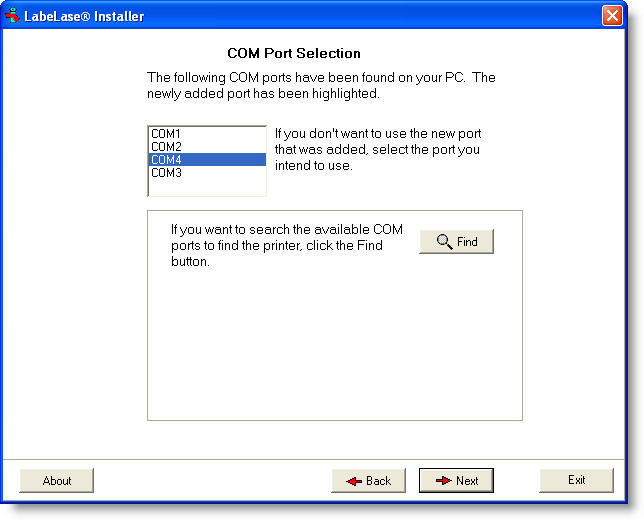
The installer program detected the addition of COM4 when the Redirector was
installed, so it has highlighted that port name in the list. If you
wish, you can now click Next to continue to the next step.
If you want to test the port to make sure it can communicate to the printer,
proceed to step 7v below.
Note that if you are running this installation program for a second time, you
may have already added the new COM port during the previous installation.
In that case, the installer will not detect the addition of a new port so you
will be required to select it yourself in the list of ports before you can
continue.
|
|
| 7v |
If you're not sure what the port name is or you want to test the
port connection, click the Find button. The program will attempt to
communicate with the printer on each of the COM ports in the list. |
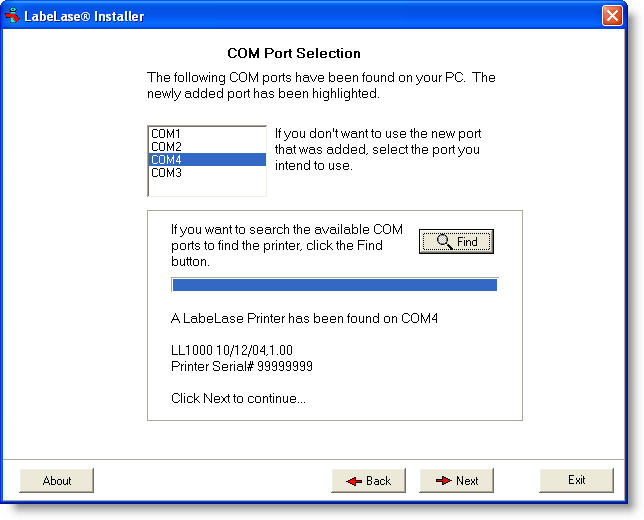
As you can see in the figure above, the program found a LL1000 model printer on
the COM4 port. It has displayed its model number, firmware version and the
printer's serial number.
|
|
| 7w |
Once you have selected or found the COM port that the printer is
attached to, click the Next button to continue. |
| If you did not use the Find button, or the program
was not able to communicate with the printer, then you will continue to Step
8 where you will select your printer model from a list.
If you used the Find button, and the program successfully found and communicated
with the printer, you will skip to Step 9 where you
will install the version of LabeLase® Producer that is appropriate for your
printer model.
|
|
|
 Ethernet
Network Connection
Ethernet
Network Connection